JRVR - JRiver Video Renderer/Configuration
JRVR configuration can be accessed through the Media Center Options, under Video -> JRVR Settings...
General
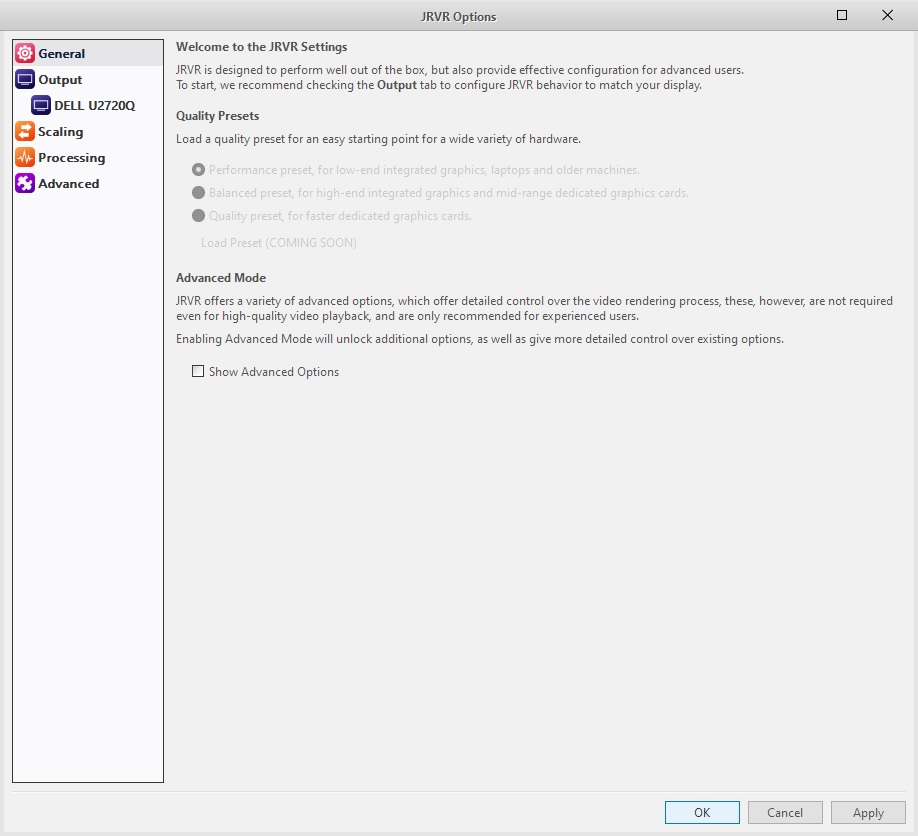
General JRVR settings, and quality presets
Quality Presets
You can load a pre-defined quality preset.
- Performance preset
- Designed for low-end integrated graphics, laptops, and older machines
- Balanced preset
- A good balance of performance and image quality, designed for high-end integrated graphics or mid-range dedicated graphics
- Quality preset
- High quality video rendering, requires a fast dedicated graphics card
Advanced Mode
JRVR offers a variety of advanced options, which offer detailed control over the video rendering process, these, however, are not required even for high-quality video playback, and are only recommended for experienced users. Enabling Advanced Mode will unlock additional options, as well as give more detailed control over existing options.
Only recommended for experienced users.
Output -> General
The Output settings specify the processing of the image specific to your screen.
Black Bar Cropping
Many videos have baked-in black bars to reach a fixed aspect ratio. JRVR can crop the black bars to give you more flexibility.
- Enable Black Bar Cropping
- Toggling this option lets you enable cropping of black bars, based on the mode selected below
- Cropping Mode
- Select a cropping mode fit for your screen and viewing habits
- Automatic Cropping is best for general use, as it'll use an analysis of the video image to determine the size of the black bars (requires Video Analysis through the Media Center Library)
- Fixed cropping ratios can be used when a fixed height output on a projector is desired, but can result in image being cut off
Aspect Ratio Handling
Control how the aspect ratio is controlled when displaying the image.
- Aspect Ratio Mode
- Change how the Aspect Ratio is handled. The default and often best choice is "Preserve Aspect Ratio", which will show the image as large as possible without sacrificing any image content or distorting the image.
- Stretch and Crop can be used for special configurations, but are not generally advised, as they sacrifice either image content, or distort the aspect ratio.
- Aspect Ratio Correction Factor
- The AR Correction Factor is used for anamorphic presentations - typically for a projector with an anamorphic lense, and the factor should be set according to the stretch factor of the lense.
Output -> HDR (High Dynamic Range)
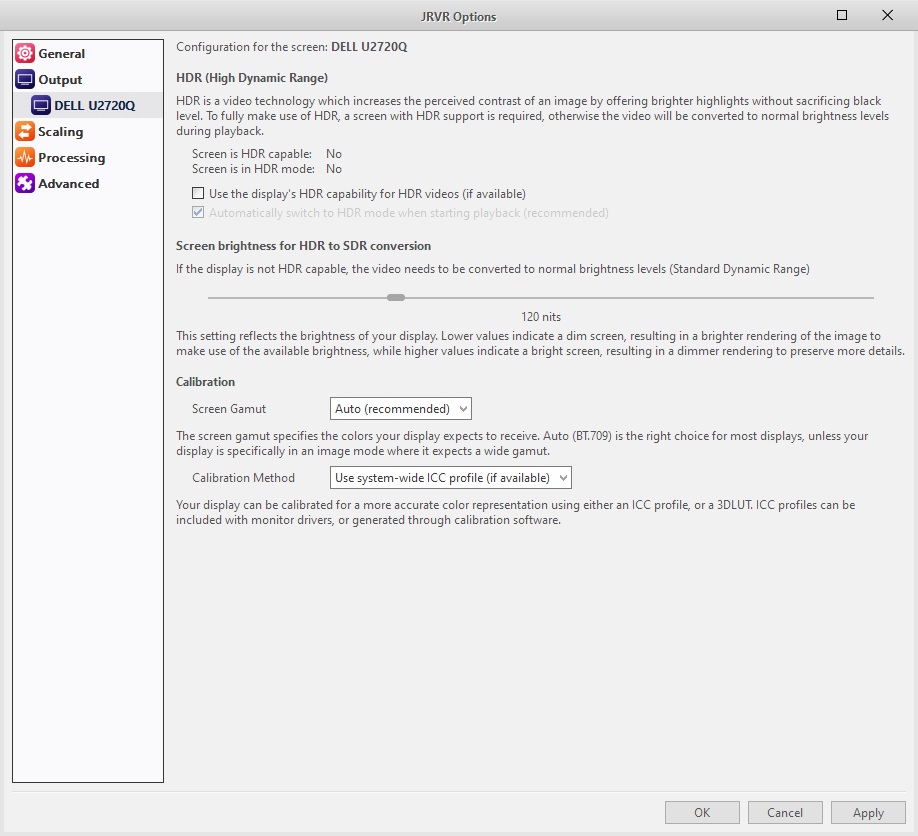
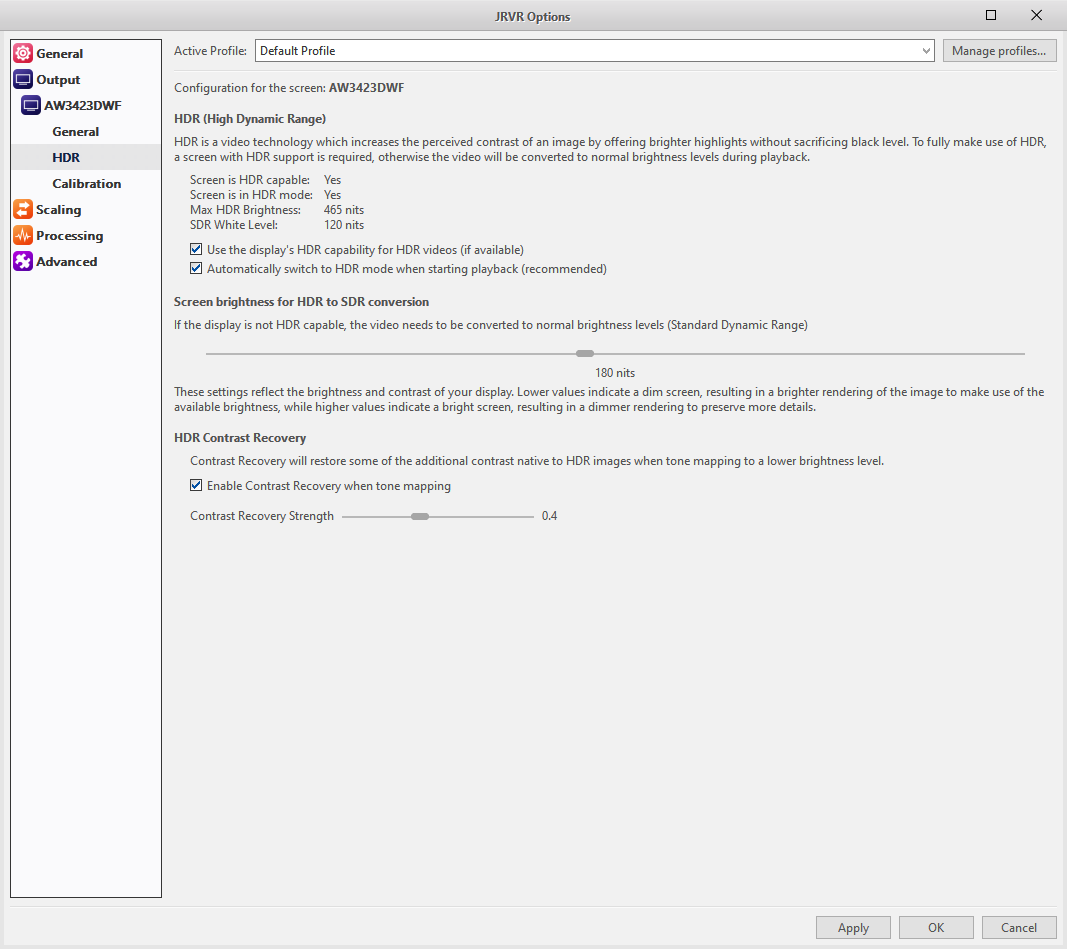
HDR is a video technology which increases the perceived contrast of an image by offering brighter highlights without sacrificing black level. To fully make use of HDR, a screen with HDR support is required, otherwise the video will be converted to normal brightness levels during playback.
The settings dialog will indicate if your screen reports to be HDR capable, and if HDR is currently active. If HDR is supported, but not active, JRVR can turn HDR mode on when playing a HDR video, which is the recommended mode of operation.
- Use the display's HDR capability for HDR videos (if available)
- Enabling this option allows JRVR to pass HDR content directly to a HDR capable screen, making use of the HDR functionality in the screen to improve the dynamic range.
- Automatically switch to HDR mode when starting playback (recommended)
- When playing a HDR video, the screen needs to be in HDR mode to handle the video - JRVR will automatically enable this mode as required.
- Screen brightness for HDR to SDR conversion
- When converting a HDR video to SDR for a normal desktop monitor, or a TV without HDR support, this setting can control the brightness of the video. There is no one fits all value, and you might want to experiment with the value to match your screen. The default range of 180 to 200 nits is a good starting point for bright monitors and TVs.
Output -> Calibration
- Screen Gamut
- The gamut your screen is configured to expect. For most displays, Auto or BT.709 will be the right choice. This is independent of the video you are playing, and should be set to the screens native gamut.
- Calibration Method
- JRVR supports calibration the image to your screen through either an ICC profile, or a 3DLUT. ICC profiles are loaded through the OS, while 3DLUTs will be loaded by JRVR.
Scaling
Upscaling
- Algorithm
- Select the main image scaling algorithm. The quality/performance changes roughly from top to bottom, from faster to higher quality.
- Scale in Sigmoidal Light
- Scaling in Sigmoidal Light helps to reduce ringing artifacts when upscaling
- SuperRes Enhancement
- SuperRes is an algorithm to refine the image after upscaling, improving sharpness and reducing scaling artifacts
Upscaling / Advanced Scaling
Advanced Scaling uses custom algorithms to improve the image upscaling at the cost of performance. These algorithms should only be enabled with a decent graphics card. Luma (Image brightness) and Chroma (Image color) are scaled independently here, and offer different algorithms to test.
Downscaling
Just as Upscaling, the same algorithms are available. However, no advanced scaling is currently supported for downscaling.
Advanced
Dithering
- Algorithm
- The Dithering Algorithm to use. We recommend using Blue Noise, as it produces the least invasive Noise in the image. Whit Noise is the fastest and noisiest, and Ordered Dithering is a decent compromise between quality and performance, but can result in visible pattern on some screens.
Trade Quality for Performance
- Allow delayed HDR peak detection
- Delayed peak detection can result in peak information being supplied one frame later, which allows the peak detection to be more efficient in some cases at the cost of less-smooth brightness changes.


