Theater View Television Guide Setup
Theater View comes with a default television guide view. Therefore generally one does not need to create a new guide view. However, some people may have deleted the default guide view in the past, and would like to get it back. The simplest way of getting the guide back is to reset Theater View settings. That approach would cause all customization to be lost. If you do not want to lose all your Theater View customization, but still want to restore the television guide view, you can do so manually. This set of instructions will tell you how.
Step 1 Create a root library item
Run Tools > Options > Theater View
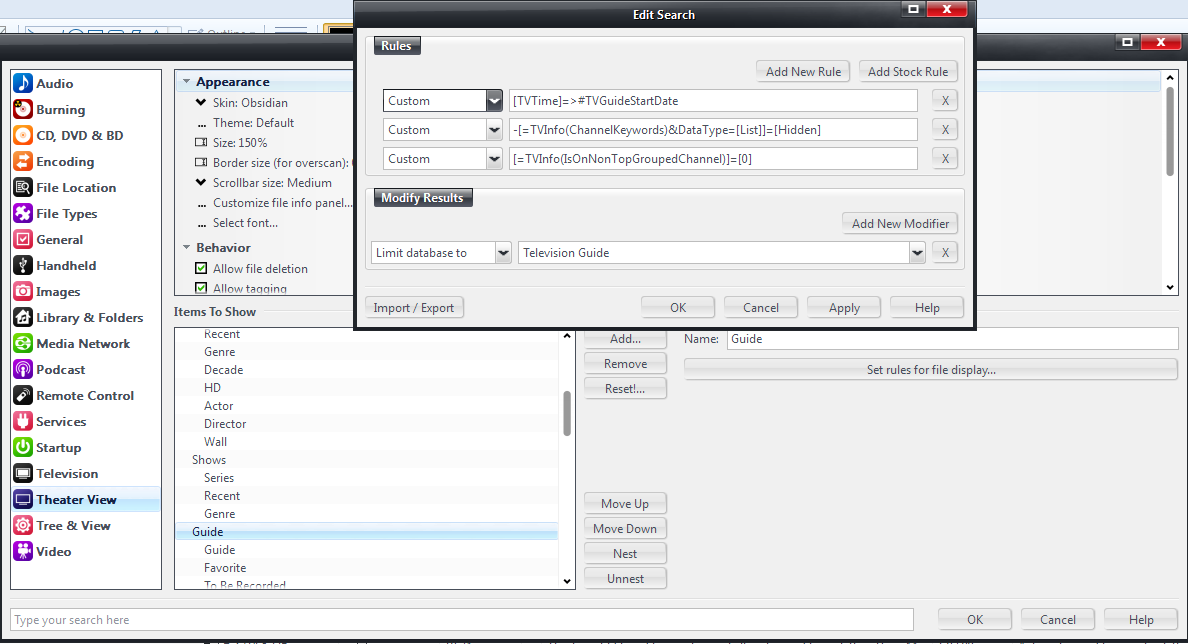
Under "Items To Show" select an item in Video group, such as "Movie", then click Add button, and choose "Root Library Item". A root item will be created. It is created as a top-level root item. You can leave it as a top-level item, or nest it under the Video category. Either way is fine. Rename the item to "Guide", or "Television". You can name it anyway you like. However, due to some implementation limitation, if you name the item something other than "Television" or "Guide", some remote control buttons will not work well. Until this limitation is lifted, it is best to stick with these choices. Now click "Set rules for file display..." button. An empty rules editing window will be displayed. Create three Custom rules under "Rules", exactly as shown in the screenshot shown below. Under "Modify Results", choose "Limit Database to" "Television Guide", as shown in the screenshot below.
Here are the three custom rules in text form, to help you use Copy and Paste:
[TVTime]=>#TVGuideStartDate
-[=TVInfo(ChannelKeywords)&DataType=[List]]=[Hidden]
[=TVInfo(IsOnNonTopGroupedChannel)]=[0]
Step 2 Customizing sub-items
The root item is created with three sub-items, called "Library item 1", "Library item 2", and "Library item 3". These should be customized so you can get different views for each item.
Guide sub-item
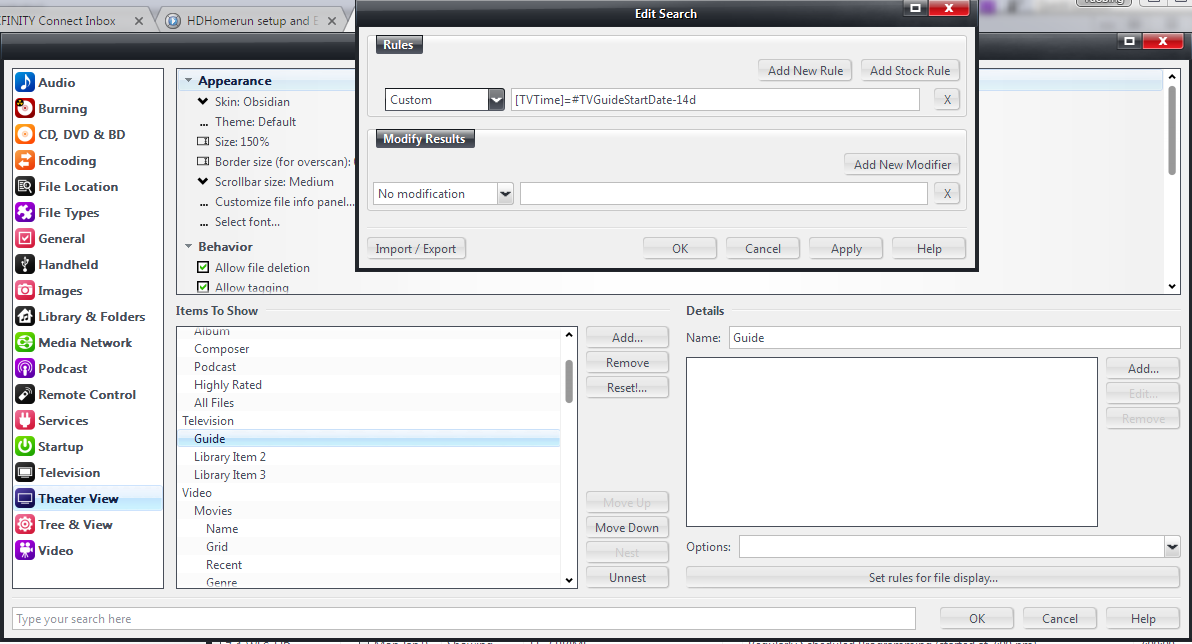
Rename "Library item 1" to "Guide". Clear all checkboxes under Options. Now click "Set rules for file display..." button. An empty rules editing window will be displayed. Create one Custom rules under "Rules", exactly as shown in the screenshot shown below.
Notice that the rule text ends with "-14d". This instructs MC to display guide data for up to 14 days (if available). You can change this to "-21d" for example, to show 21 days of guide data. The actual number of days of data available is determined by the guide source you use, and therefore you may not get 21 days of data even if you set it to -21d here.
Favorite sub-item
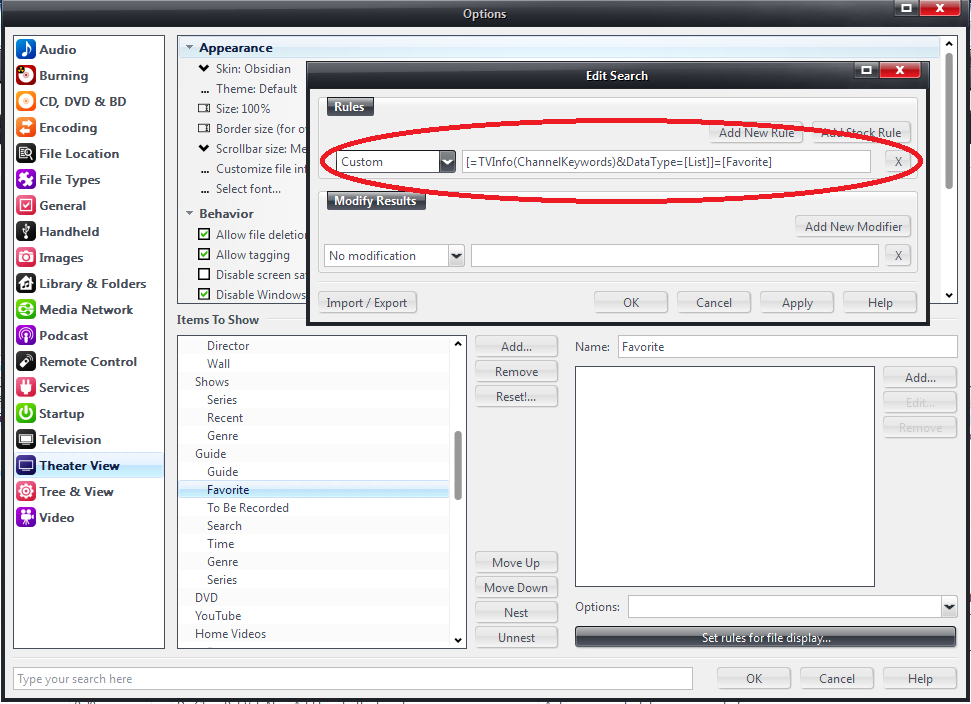
Rename "Library item 2" to "Favorite" (or "Favorite Channels". Clear all checkboxes under Options. Now click "Set rules for file display..." button. An empty rules editing window will be displayed. Create one Custom rules under "Rules", exactly as shown in the screenshot shown below.
This view displays guide programs on your favorite channels (if you have set up some).
To Be Recorded sub-item
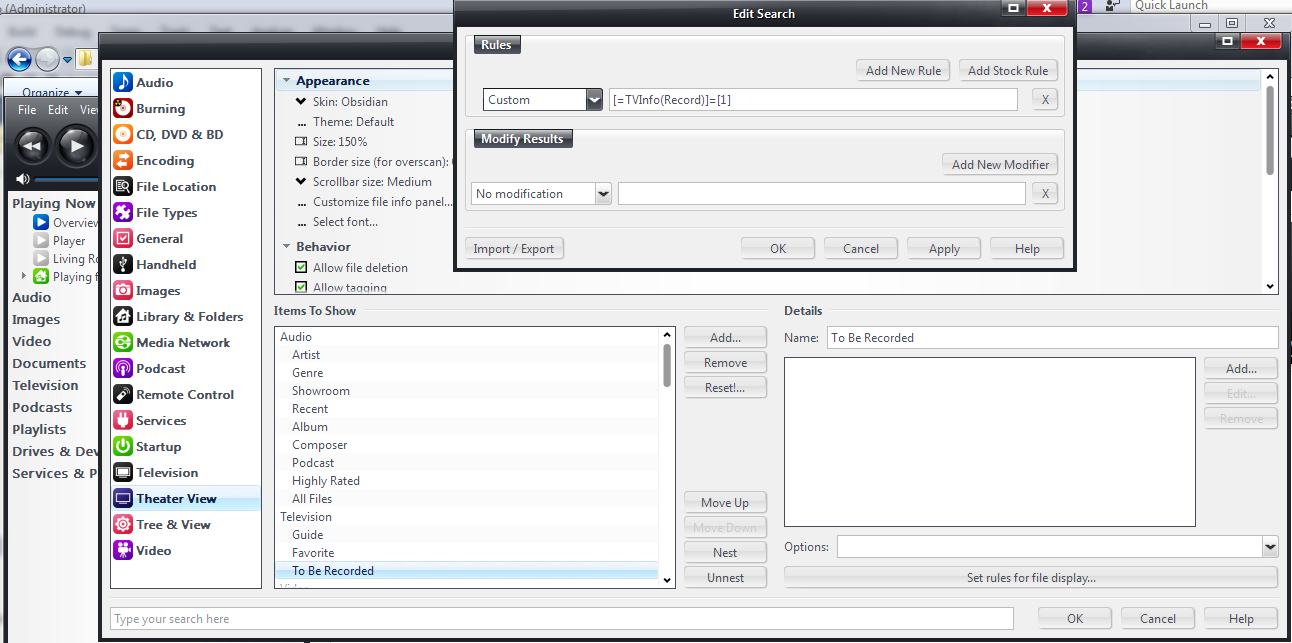
Rename "Library item 3" to "To Be Recorded". Clear all checkboxes under Options. Now click "Set rules for file display..." button. An empty rules editing window will be displayed. Create one Custom rules under "Rules", exactly as shown in the screenshot shown below.
This view will show all shows that will be recorded in the near future.
Other sub-items
Other sub-items can also be added. The following are found in the default setup:
Search Time Genre Series
Search
Search allows you to search for a program in Theater View, using a remote control. It displays an on-screen "keyboard".
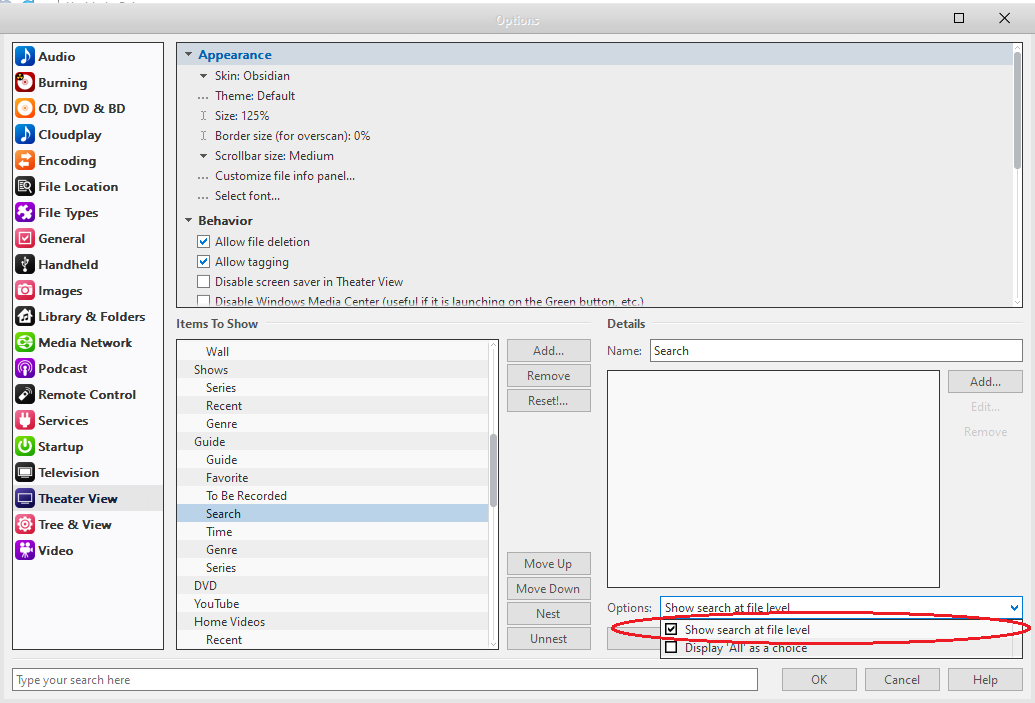
To set up this manually, choose the top-level Guide item (the parent of "Guide", "Favorite", "To be recorded", etc.), and choose Add..., Library item. Name it "Search". From Options drop list, choose "Show search at file level". Do not add any rules. That is it!
Time
Time allows you to look for programs at a specific time.
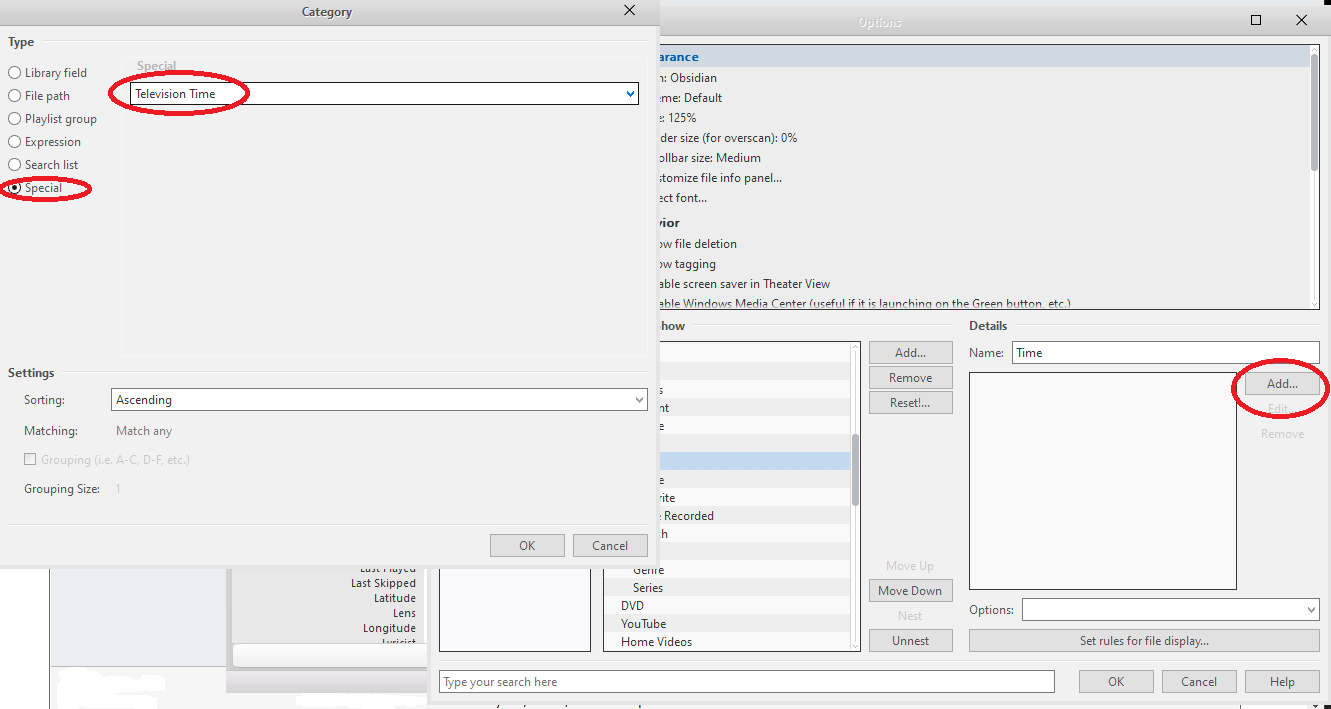
To set up this manually, choose the top-level Guide item (the parent of "Guide", "Favorite", "To be recorded", etc.), and choose Add..., Library item. Name it "Time". Right below the Name box, there is an Add... button. Click it. On the resulting window, choose "Special" type. From the drop list, choose "Television Time". Click OK. Do not add any rules. Leave Options empty.
Genre & Series
To get "Genre", add it as above, no Options. Name it "Genre". Just under the Name box, click Add, and on the resulting dialog window, select "Library field" on the left, and choose "Genre" from the "Select Field" box. Click OK. That is it.
You can add "Series" in the same way.
In the same fashion you can add other items that are not in the default setup.
Step 3 List style
Now you are ready to see the result in Theater View. Enter Theater View. Select "Guide" (or "Television"), select subitem "Guide". You will find that it does not look like the grid-style TV guide. This can be changed by going to "More" > "Toggle List Style". Keep pressing the Enter key on your keyboard, or the OK button on your remote control, until the desired list style (guide grid) is displayed. Repeat the same for "Favorite" subitem.
