Theater View: Difference between revisions
No edit summary |
RoderickGI (talk | contribs) No edit summary |
||
| (25 intermediate revisions by 3 users not shown) | |||
| Line 1: | Line 1: | ||
Theater View is MC's interface for use from across the room. It's well suited for installs where a TV is used for the display. It works well with |
Theater View is MC's interface for use from across the room. It's well suited for installs where a TV is used for the display. It works well with JRiver's [[Media Center Remote]], with [[JRemote]] for iOS and Android, or with [[Gizmo]] for Android. |
||
Theater View also works well for touch screen computers. |
Theater View also works well for touch screen computers. |
||
<gallery widths=400px heights=240px> |
|||
[[Image:TheaterViewInfo.jpg|400px]] [[Image:Animated_list.jpg|400px]] |
|||
File:Theater_View16.jpg |
|||
File:TheaterView-MediaViews-New Movies.png |
|||
File:TheaterView-MediaViews-Movie_Detail.png |
|||
File:Animated_list.jpg |
|||
</gallery> |
|||
[http://pix01.com/Ur%40nU21 More pictures from MC16] |
[http://pix01.com/Ur%40nU21 More pictures from MC16] |
||
| Line 10: | Line 15: | ||
This wiki page references options available within 'Tools' -> 'Options' -> 'Theater View' [updated for MC15]. |
This wiki page references options available within 'Tools' -> 'Options' -> 'Theater View' [updated for MC15]. |
||
==Appearance== |
==Appearance== |
||
| Line 32: | Line 36: | ||
==Advanced== |
==Advanced== |
||
*'''Allow special handling on media insertion''': With this setting ticked, DVD and Blu-ray discs will be automatically played on insertion even if Autoplay is turned off in Windows and MC. CDs will not be Autoplayed. This is a legacy setting, introduced in 2009, and appears to have been most useful when an external optical disc player such as TMT or PowerDVD was used with MC. It may be best to leave this turned off and use the MC and Windows Autoplay settings instead, or just play the disc once it has been detected by MC, and is ready to play. |
|||
*'''Allow special handling on media insertion''' |
|||
* '''File Caption''': Insert the rule you want to use to display captions under the thumbnail. By default, this is set to [Name]. For information about rules, see Smartlist and Search - Rules and Modifiers |
* '''File Caption''': Insert the rule you want to use to display captions under the thumbnail. By default, this is set to [Name]. For information about rules, see Smartlist and Search - Rules and Modifiers |
||
*'''Framerate''': default is 60 fps |
*'''Framerate''': default is 60 fps |
||
| Line 48: | Line 52: | ||
Click on "Click to see Instructions..." button in the options section for more info. |
Click on "Click to see Instructions..." button in the options section for more info. |
||
== Theater View and Television == |
|||
See the [[Theater View Television Guide Setup]] guide for details. |
|||
==Background Images and Videos== |
==Background Images and Videos== |
||
Starting with MC14, you can display custom backgrounds and images. You can move files to the appropriate directories located here: |
Starting with MC14, you can display custom backgrounds and images. You can move files to the appropriate directories located here: |
||
C:\Program Files\J River\Media Center xx\Skins\Theater View\Themes\Default |
C:\Program Files\J River\Media Center xx\Skins\Theater View\Themes\Default |
||
==Keyboard Shortcuts== |
==Keyboard Shortcuts== |
||
| Line 73: | Line 79: | ||
==More== |
==More== |
||
* [[Making Theater View Skins]] |
* [[Making Theater View Skins]] |
||
* [http://yabb.jriver.com/interact/index.php?topic=87161.msg596588#msg596588 Theater View Theme Customization] |
|||
* [[On Screen Display]] (OSD) |
|||
* [https://yabb.jriver.com/interact/index.php?topic=111721.0 More on Theatre View and Television] |
|||
[[Category: |
[[Category:Theater View]] |
||
[[Category:Frequently Asked Questions]] |
|||
[[category:Options]] |
[[category:Options]] |
||
Latest revision as of 00:54, 25 September 2018
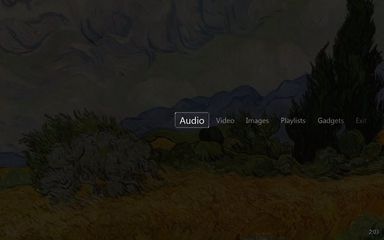
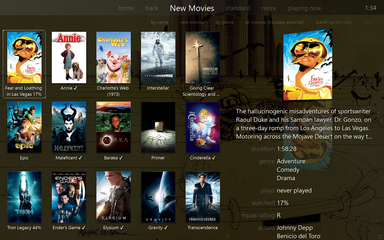
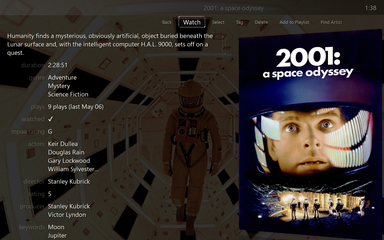
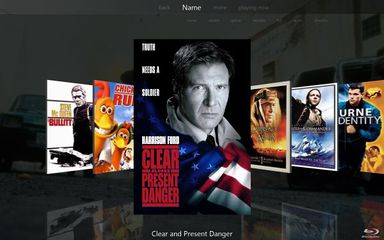
Theater View is MC's interface for use from across the room. It's well suited for installs where a TV is used for the display. It works well with JRiver's Media Center Remote, with JRemote for iOS and Android, or with Gizmo for Android.
Theater View also works well for touch screen computers.
You can enter Theater View by going to 'View'->'Theater View' or by the keyboard shortcut, Ctl+4
This wiki page references options available within 'Tools' -> 'Options' -> 'Theater View' [updated for MC15].
Appearance
- Skin: Select the skin to be used in Theater View. This is where you can select a touchscreen skin, making Theater View compatible with your touchscreen computer.
- Theme: Select theme and theme settings
- Size: Select the size of the Theater View lists and icons. The default is "100%".
- Border Size: Default is 0%
- Drawing Quality: Default is "Medium Quality"
- Customize file info panel
- Select Font
Behavior
- Disable Screen Saver in Theater View
- Disable Windows Media Center
- Enter key action
- Jump on play: None, Playing Now or Full Screen: This determines what Theater View displays when you play something. If you tend to watch video or images, you may want to set it to Full Screen.
- Pause video playback when entering Theater View
- Play sound: When enabled, Media Center plays a sound when Theater View menu items are selected.
Advanced
- Allow special handling on media insertion: With this setting ticked, DVD and Blu-ray discs will be automatically played on insertion even if Autoplay is turned off in Windows and MC. CDs will not be Autoplayed. This is a legacy setting, introduced in 2009, and appears to have been most useful when an external optical disc player such as TMT or PowerDVD was used with MC. It may be best to leave this turned off and use the MC and Windows Autoplay settings instead, or just play the disc once it has been detected by MC, and is ready to play.
- File Caption: Insert the rule you want to use to display captions under the thumbnail. By default, this is set to [Name]. For information about rules, see Smartlist and Search - Rules and Modifiers
- Framerate: default is 60 fps
- Show home button
- Show page up and page down buttons
- Show scrollbars
- Switch to zone on load
- Tag menu fields
- Use alternate navigation model
Items to Show
There are the menu items throughout the Theater View interface. You can Add, Edit, Remove, Nest, and Sort them using the tree and commands found in the lower half of the Theater View Options.
Click on "Click to see Instructions..." button in the options section for more info.
Theater View and Television
See the Theater View Television Guide Setup guide for details.
Background Images and Videos
Starting with MC14, you can display custom backgrounds and images. You can move files to the appropriate directories located here: C:\Program Files\J River\Media Center xx\Skins\Theater View\Themes\Default
Keyboard Shortcuts
In order to create a more usable theater setup on a Home Theater PC (HTPC), it is important to understand the keyboard shortcuts that are available. This allows infrared or RF remotes to be programmed to control a variety of features in Media Center's theater view.
- Arrows. The four arrows are used for navigating the elements presented by theater view.
- Enter. Selects an item which is highlighted to expand its properties.
- Ctrl + p. Plays and pauses video.
- Ctrl + n. Next track or chapter in DVD.
- Ctrl + l. Previous track or chatper in DVD.
- i. Zooms in on video at about a percent each button press.
- o. Zooms out on video at about a percent each button press.
- a. Cycles between various aspect ratios to help stretch or zoom a picture to better fit the display.
- Backspace. Travels back one page and can eventually return users to the home page.
- Page up / Page down. Travels one full page up or down to help expedite scrolling.
- Ctrl + -> / Ctrl + <-. Fast forwards or rewinds video at 5x, 20x, and 100x with incredibly good quality on DVD video content.
- Home / End. Jumps to the top or bottom of a list.
- Esc. Starts the exit process from theater view. Users must then select Yes to confirm exiting.


