Television and Panel: Difference between pages
No edit summary |
|||
| Line 1: | Line 1: | ||
'''Instructions''' are at the bottom of this topic. You need to have JRiver Media Center installed and running (either MC or Media Server). You will then connect to it from a browser on port 52199. |
|||
| ⚫ | |||
Panel works with a computer, a phone, or a tablet. It uses HTML5 to do some cool stuff. |
|||
You can use Media Center to watch high quality HD television on your PC. You can also connect a PC to your TV or projector and watch it there. |
|||
Here's a screenshot: |
|||
With the switch to digital television, the picture quality of over-the-air television is stunningly good. There are also many channels to be found on Satellite, many of them clear of encryption and, therefore, free to watch without subscription. Add a Netflix subscription and you may feel like dropping your cable subscription. |
|||
| ⚫ | |||
MC can pause, rewind, fast forward, or record. Together with the Electronic Program Guide ([http://yabb.jriver.com/interact/index.php?topic=48140.0 EPG]), this makes it an ideal Personal Video Recorder (PVR). Please see the wiki entry for [http://wiki.jriver.com/index.php/EPG EPG Setup]. |
|||
[http://www.pix01.com/gallery/8D12431D-7EA0-495D-9EA2-775091458CB9/MC22_Web_Interface_Apps/711673949_orig0.jpg Larger Image] |
|||
[[Image:Theater_View_151.jpg]] |
|||
The web page in the screenshot is generated by MC and it brings together many of the client apps that we've built. It builds on work we've done over the years, and on a lot of recent work by most members of the team. It looks simple, but it isn't. |
|||
[http://www.pix01.com/gallery/8D12431D-7EA0-495D-9EA2-775091458CB9/Theater_View_13.0.93/ Theater View]'s ten foot interface is the best way to enjoy MC's television. [http://yabb.jriver.com/interact/index.php?topic=48127.0 MC13] implemented support for the Microsoft Media Center (MS MC) remotes. The remotes for XP are different from the ones for Vista, so you'll need to get the right one for your OS. |
|||
Panel is a suite of apps in one location, a smart web app that's easy to use. It provides direct access to apps that you may have used or heard about: WebGizmo, WebPlay, WebRemote, [http://yabb.jriver.com/interact/index.php?board=48.0 Engen], and MC. |
|||
If you're concerned about power consumption, you'll be glad that MC can wake the PC from sleep in order to record a show. |
|||
It's friendly. Point and click (or touch). Something happens. |
|||
==Hardware== |
|||
JRiver Media Center supports most HD tuners and supports ATSC, DVB-T/T2 (terrestrial - over the air), DVB-S/S2 (satellite), DVB-C (cable) and QAM (cable). You can read more about tuners on JRiver's [http://yabb.jriver.com/interact/index.php?board=11.0 TV Board]. MC can support multiple tuners so you can record two or more channels at the same time, or record one channel while you watch another. |
|||
Here's a live version you can try at JRiver: |
|||
Here are a few recommended hardware choices: |
|||
http://idtest.jriver.com:52199 login/password: first/second |
|||
The settings icon provides remote access to the [http://www.jriver.com/Id/ JRiver Id] settings now and will give you access to some of MC's settings in the future. |
|||
JRiver offers a [http://wiki.jriver.com/index.php/Media_Center_Remote Media Center Remote] and a USB [http://wiki.jriver.com/index.php/TV_Stick TV Stick] tuner. |
|||
The + icon leads to more apps. |
|||
[[Image:vista_remote.jpg]] |
|||
Panel will be expanded to include other apps. It will always be the easy to find launch point. |
|||
[[Image:antenna.jpg]] |
|||
[http://pix01.com/TF1%405V More Screenshots of Panel on a Desktop] |
|||
[http://www.radioshack.com/product/index.jsp?productId=2348191 HDTV Indoor/Outdoor Television Antenna] |
|||
[http://pix01.com/UF1%40akPc Panel on a Phone] |
|||
| ⚫ | |||
==Instructions== |
== Instructions == |
||
[https://yabb.jriver.com/interact/index.php/topic,116687.msg806546.html#msg806546 Instructions on the forum] |
|||
Make sure Media Center or Media Server is running. Media Network must be turned on in MC settings. |
|||
===Install the Tuner=== |
|||
Open Panel from a web browser on any device by entering this URL: |
|||
The simplest way to add television to MC is to use a USB HD TV stick. They typically cost around $70. There is also a huge choice of PCI-E cards with multiple tuners and different network types combined into the same card. You don't need one with a remote. |
|||
http://[IP_Address]:52199 (changing [IP_Address] to your own IP address) Example: http://192.168.0.13:52199 |
|||
Plug in the USB stick or install the internal card. |
|||
For a secure connection, you can use port 52200: |
|||
Install the driver that came with the device. |
|||
https://[IP_Address]:52200 (changing [IP_Address] to your own IP address) Example: https://192.168.0.13:52200 (please note that this uses https, not http) |
|||
Connect a digital antenna and/or satellite dish feed or cable to the device. |
|||
http://localhost:52199 or https://localhost:52200 will do the same thing when the browser is running on the same machine as MC. |
|||
===Scan For Channels=== |
|||
Your firewall must accept inbound connections on the port you use. Please see our wiki topic called [https://wiki.jriver.com/index.php/Network_Access Network Access] for more information. |
|||
Run MC. Under Tools > Options > General > Features, make sure TV is checked. |
|||
If you have set "Authentication" on your server (under Media Network settings), you will be asked for a login and password. The login is visible in MC's Media Network settings. |
|||
Under Drives and Devices, open Television. |
|||
== Access Key == |
|||
Choose "TV Options" - bottom left of the pane. Under "Settings", select your country and choose a device. Click Configure and select the Tuner Type. The other settings are not important at this stage. If you have more than one tuner, do the same for each. Click OK to return to Options and OK again. |
|||
You can also start Panel by entering your [[Access Key]] here: |
|||
https://jriver.com/panel.html |
|||
Under TV Options, choose "Scan for Channels". Check "Scan for digital channels". Click Next and select "Digital Scanning Type" Complete the options relevant to the scanning type. Some may be greyed out if they are not appropriate. Click Next to start the scan. The scan may take several minutes so be patient. You should see a list of channels build in the window. |
|||
If you are connecting from the same LAN, choose "Inside" below the Access Key. |
|||
When the scan has completed, if you have more than one type of tuner, e.g. a combined DVB-T and DVB-S card, repeat the process and select the relevant device. If you have a dual tuner with both tuners being the same type, you only need to scan once. |
|||
== More == |
|||
Now, in the main Television pane, you should see a list of channels. Try playing a few channels. They take a few seconds to switch. The antenna must be pointed at the broadcast source. |
|||
[https://yabb.jriver.com/interact/index.php/topic,115638.msg799062.html#msg799062 MC24 Thread on Interact] |
|||
===Editing The Channel List=== |
|||
[https://yabb.jriver.com/interact/index.php/topic,105883.0.html MC23 Thread on Interact] where you can read more or ask a question. |
|||
You may find that you have many channels which you don't want to watch. There are two ways around this. You can select the channels which you want to appear in the Guide (Favorites) or you can delete the ones you don't want. |
|||
[http://pix01.com/TF1%405V Screenshots] from October, 2017. |
|||
To delete channels, again there are two ways. The first, which is a bit slow, is to select TV Options > Edit Channel List. Ignore the check boxes against the channels. These are to select the channel as a Favorite. Click once on the channel name you want to delete and select "Delete Channel". This option will only delete one channel at a time. |
|||
| ⚫ | |||
The second way to delete is to create a Smartlist containing all the channels and delete from that. There are other advantages to having this Smartlist which we will come to later. Right click on Playlists in the left pane of Standard View and select "Add Smartlist". Name it, e.g. TV Channels and, under Rules, set Media Type is TV. Remember to uncheck Audio which is the default. Now all your channels will be listed in the main pane. To make sure your smart list is setup correctly, you can check the "Filename" for each entry. They have filename extension "tvlb". The filenames all begin with "TV Channel" and ends with "([tuner type])", like |
|||
"TV Channel xxxxxxxxxx (ATSC).tvlb" |
|||
"TV Channel xxxxxxxxxx (Set Top Box).tvlb" |
|||
A piece of advice at this stage. Create a backup. File > Library > Back Up Library. Now, if you accidentally delete channels which you want, you can restore the library. Now, holding the Alt key, click on those channels which you want to delete. Point to any one of these selected lines and right click and select delete. Confirm Delete from Library. |
|||
You can then [http://wiki.jriver.com/index.php/EPG set up an EPG]. |
|||
MC's Television is at its best when used with [http://yabb.jriver.com/interact/index.php?topic=49709.0 Theater View] and a [http://wiki.jriver.com/index.php/Media_Center_Remote Media Center Remote]. |
|||
[http://wiki.jriver.com/index.php/Set_Top_Box Set Top Box] |
|||
Latest revision as of 17:04, 19 May 2024
Instructions are at the bottom of this topic. You need to have JRiver Media Center installed and running (either MC or Media Server). You will then connect to it from a browser on port 52199.
Panel works with a computer, a phone, or a tablet. It uses HTML5 to do some cool stuff.
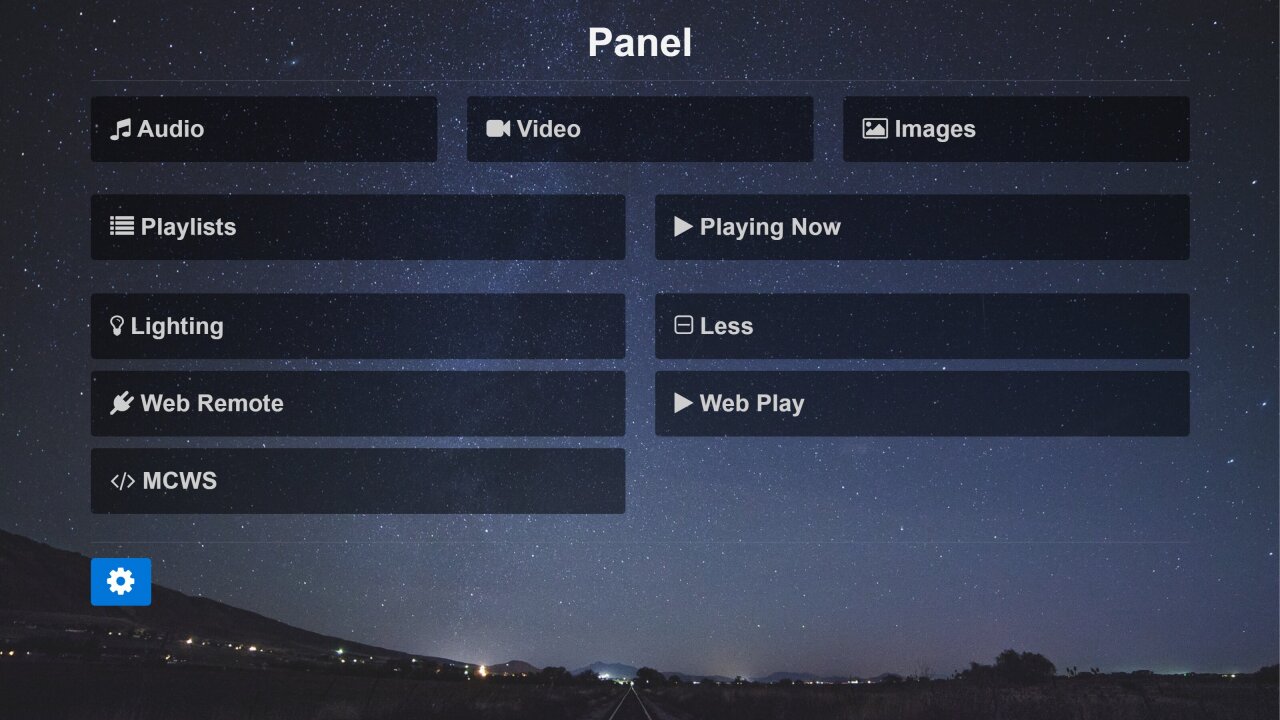
Here's a screenshot:

The web page in the screenshot is generated by MC and it brings together many of the client apps that we've built. It builds on work we've done over the years, and on a lot of recent work by most members of the team. It looks simple, but it isn't.
Panel is a suite of apps in one location, a smart web app that's easy to use. It provides direct access to apps that you may have used or heard about: WebGizmo, WebPlay, WebRemote, Engen, and MC.
It's friendly. Point and click (or touch). Something happens.
Here's a live version you can try at JRiver: http://idtest.jriver.com:52199 login/password: first/second
The settings icon provides remote access to the JRiver Id settings now and will give you access to some of MC's settings in the future.
The + icon leads to more apps.
Panel will be expanded to include other apps. It will always be the easy to find launch point.
More Screenshots of Panel on a Desktop
Instructions
Make sure Media Center or Media Server is running. Media Network must be turned on in MC settings.
Open Panel from a web browser on any device by entering this URL:
http://[IP_Address]:52199 (changing [IP_Address] to your own IP address) Example: http://192.168.0.13:52199
For a secure connection, you can use port 52200:
https://[IP_Address]:52200 (changing [IP_Address] to your own IP address) Example: https://192.168.0.13:52200 (please note that this uses https, not http)
http://localhost:52199 or https://localhost:52200 will do the same thing when the browser is running on the same machine as MC.
Your firewall must accept inbound connections on the port you use. Please see our wiki topic called Network Access for more information.
If you have set "Authentication" on your server (under Media Network settings), you will be asked for a login and password. The login is visible in MC's Media Network settings.
Access Key
You can also start Panel by entering your Access Key here:
If you are connecting from the same LAN, choose "Inside" below the Access Key.
More
MC23 Thread on Interact where you can read more or ask a question.
Screenshots from October, 2017.